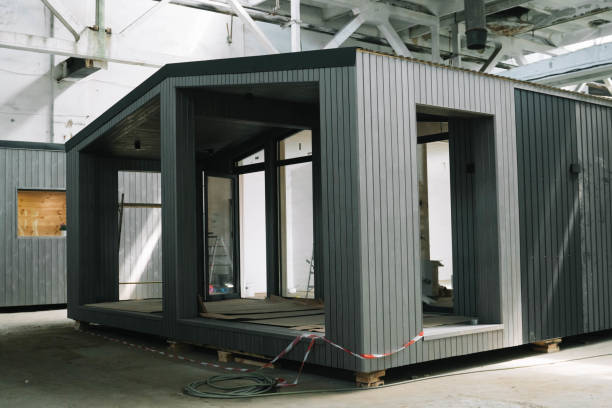
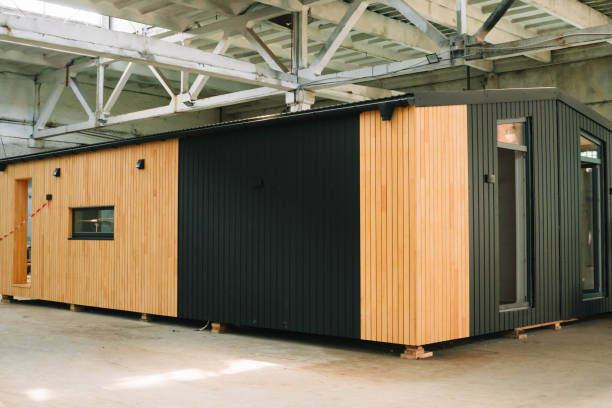
How Do I Build a Tiny Modular Home as a Backyard Office in 2026?

In today’s fast‑moving world, the idea of a tiny modular home that doubles as a functional backyard office is more than a trend—it's a practical solution to space constraints, cost pressures, and the desire for flexibility. This guide walks you through every step, from initial concept to final installation, ensuring you create a next‑gen housing option that works for your lifestyle.
1. Clarify Your Purpose and Space Requirements
I start by defining what I need the space for: will it be a permanent home office, a rental unit, or a short‑term stay? Knowing the primary function dictates layout choices, size limits, and required amenities. In my experience, setting clear goals early eliminates costly redesigns later.
Key Space Factors to Assess
- Desired square footage (typically 200–400 sq ft for a tiny modular home)
- Number of occupants or guests it must accommodate
- Essential rooms: work area, sleeping nook, kitchenette, bathroom
- Power and internet requirements for remote work
- Storage needs for office supplies or seasonal items
- Proximity to existing utilities (water, sewer, electricity)
- Site topography and drainage considerations
- Future expansion possibilities (e.g., adding a loft or second module)
- Local climate: will the structure handle heat, cold, wind, or humidity?
- Neighborhood character: is a modern modular look acceptable in your cul‑de‑sac?
This assessment shapes every subsequent decision—from material selection to regulatory compliance.
2. Choose the Right Modular Format: Tiny, Mobile, or Container?
I compare three main types of modular construction that fit backyard office needs. Each has distinct benefits and trade‑offs in cost, mobility, and aesthetic appeal.
Comparison Summary
- Tiny modular homes: Customizable panels; ideal for permanent installations; lower transport costs.
- Mobile modular homes: Designed on wheels or trailers; great for seasonal use or future relocation.
- Container homes: Repurposed shipping containers; rugged, quick to assemble, but may need extensive insulation and ventilation.
I lean toward tiny modular homes for backyard offices because they balance cost, flexibility, and ease of integration with existing landscaping. However, if you anticipate moving the unit or require a robust structure that can withstand extreme weather, a mobile or container option might be worth exploring.
3. Design Your Layout and Workflow
Once the format is chosen, I draft a floor plan that maximizes natural light and airflow. The goal is a seamless workflow: from desk to kitchenette to bathroom, all within a compact footprint.
Essential Layout Elements
- Desk zone: Ergonomic workstation with adjustable height options.
- Sleeping area: Loft or Murphy bed to preserve floor space.
- Kitchenette: Compact fridge, sink, and microwave; consider a pop‑up pot rack for storage.
- Bathroom: Mini shower with composting toilet if plumbing is limited.
- Storage: Built‑in cabinets above the desk and under the bed.
- Ventilation: Exhaust fan in kitchen, window vents or a small HVAC unit.
- Insulation: R-30 or higher for walls to keep energy costs low.
- Smart controls: Wi‑Fi powered lighting and climate systems.
- Acoustic treatment: Thin panels or fabric curtains can reduce echo in a small space.
The layout should reflect the way I use the space daily, ensuring the office feels like an extension of my home rather than a separate unit. When sketching your floor plan, think about the flow of movement: keep high‑traffic areas clear and place frequently used items within easy reach to reduce clutter.
4. Select Materials and Suppliers Wisely
I prioritize durability, sustainability, and cost. Modern modular kits often come with pre‑cut panels and integrated plumbing, reducing labor hours.
Material Checklist
- Structural frame: High‑strength steel or engineered timber (glulam).
- Wall panels: SIPs (structural insulated panels) for thermal efficiency.
- Roofing material: Metal with a built‑in insulation layer.
- Flooring: Bamboo or recycled composite for eco‑friendly appeal.
- Windows: Triple‑pane low‑E glass for energy savings.
- Insulation: Closed‑cell spray foam inside walls and roof.
- Finishes: Low‑VOC paints, natural wood veneers.
- Hardware: Stainless steel hinges, lock systems with remote access.
- Exterior cladding: Fiber‑cement siding or reclaimed cedar for a weather‑resistant finish.
When sourcing kits, I compare lead times, warranty terms, and after‑sales support from reputable manufacturers like Katerra or Custom Homes Inc. This reduces the risk of delays during construction. If you prefer local craftsmanship, look for suppliers that offer modular components made in your region; this can also boost local economies.
5. Navigate Permitting and Local Regulations
Even though modular homes are often considered “pre‑built,” local zoning codes still apply. I consult with a licensed architect to ensure compliance before ordering materials.
Permitting Checklist
- Zoning: Verify the lot is eligible for tiny residential structures.
- Building code: Confirm minimum height, egress windows, and fire safety standards.
- Utility connections: Obtain permits for water, sewer, and electrical hookups.
- Environmental review: Check drainage requirements and impact on local ecosystems.
- Insurance: Update homeowner’s policy to cover the new structure.
- Neighborhood association: If applicable, submit plans for approval.
In my experience, securing all permits before the first panel arrives prevents costly rework and keeps project timelines intact. Keep a file of every correspondence and stamped approvals; they are invaluable if you encounter questions during inspection.
6. Plan for Installation: From Shipping to Final Assembly
The installation phase is where design meets reality. I schedule delivery windows, secure a flat foundation, and coordinate with the assembly crew.
Installation Steps
- Foundation: Concrete slab or pier‑and‑beam system; size based on local soil reports.
- Delivery: Arrange logistics for panel drop‑off at a pre‑approved site.
- Assembly: Use the manufacturer’s modular assembly sequence; typically takes 2–4 weeks.
- Utility Hookups: Connect plumbing, electrical, and HVAC as per code.
- Finishing Touches: Install windows, doors, interior trim, and paint.
- Inspections: Schedule building inspector visits at critical milestones.
- Final Walk‑through: Conduct a comprehensive review with the builder to confirm all systems are operational.
The key is to keep the workspace organized; a clear assembly plan reduces downtime and ensures safety on site. If you’re handling some of the work yourself, mark panel positions in advance so movers can focus on structural joints without confusion.
7. Maintain and Future‑Proof Your Tiny Modular Office
After construction, regular maintenance keeps the home efficient and comfortable. I also anticipate future upgrades—like adding solar panels or expanding storage—to preserve value over time.
Maintenance & Upgrade Guide
- Insulation check: Inspect for moisture damage every 3–5 years.
- Roof inspection: Look for leaks after heavy storms.
- HVAC servicing: Replace filters quarterly; schedule professional service biannually.
- Electrical safety: Test outlets and GFCI protection annually.
- Smart system updates: Keep firmware current to avoid security gaps.
- Solar integration: Consider adding a 5‑kW array if sunlight exposure is adequate; many kits now support solar mounting brackets out of the box.
- Storage solutions: Reassess as needs change; modular shelving can be reconfigured with minimal effort.
- Seasonal cleaning: Remove dust from vents and panels before winter to maintain airflow.
By treating the tiny modular home like any other investment, I keep its performance high and my living quality steady. Over time, a well‑maintained unit can serve as an emergency shelter, guest house, or even a small rental that supplements income.
8. Wrap‑Up: Making Your Backyard Office a Reality
Building a tiny modular home for your backyard office is a practical, scalable solution that blends modern design with functional space. By following the steps above—clarifying needs, selecting the right format, designing thoughtfully, sourcing wisely, securing permits, installing efficiently, and maintaining diligently—you’ll create a space that supports work, rest, and future growth.
Beyond construction, consider financing options such as modular home loans or local incentives for energy‑efficient builds. Some municipalities offer tax credits for green building practices, which can offset upfront costs.
The most critical takeaway: start with a clear purpose and let every design decision serve that purpose. It saves time, money, and headaches in the long run. What is the biggest challenge you foresee when converting your backyard into a modular office space?